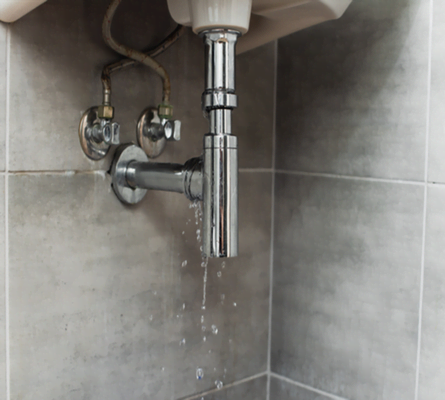
Leaking pipes can be a major headache, especially if you don’t know how to fix it yourself. It’s a problem that is easily solved, but can lead to costly repairs, such as replacing a whole section of a house’s plumbing. Fortunately, there are many ways to repair leaking pipes without having to call a professional plumber or invest in expensive repairs. Here are ten methods for getting your water flowing again. So, If you’re tired of spending money on plumbing repairs and you want to get the problem solved quickly, read this article.
1. Identify the Problem
The first step in fixing leaking pipes is to figure out where the problem is. The most common causes of leaks include faulty plumbing, a clogged drain, or a broken pipe. If you suspect a leak is coming from the sink, the shower, or the tub, check each one of those areas for a leak. If you’re not sure where the problem is, call a plumber to inspect your pipes. Once you’ve identified the problem, you can start repairing it.
2. Seal the Problem Area
After you’ve identified the problem, you’ll want to fix it. For that you need to seal the area to prevent any more water from leaking out. To do this, you’ll need to cover the hole or crack with a caulk. The best way to do this is to use a caulking gun. But if you don’t have one, you can also use a sealant. You’ll want to use a material that is made for the specific area that you’re repairing.
3. Add a Barrier
After you’ve covered the leak, you’ll want to add a barrier to prevent any more water from leaking out. This barrier can be anything, from a simple plastic wrap to a thick layer of caulk. The important thing is that the barrier should cover the entire area where the leak is occurring.
4. Fill the Leak
The next step is to fill the leak. If the leak is small, you can use a syringe or some other method to inject the sealant into the crack or hole. If the leak is large, you’ll need to use a larger material.
Accordingly, you’ll need to fill the area with something that is both flexible and able to withstand high pressure. For this, you’ll want to use a pipe plug.
5. Patch the Pipe
If you can’t seal the leak, you’ll need to patch it. The easiest way to do this is to use a patch. This is a piece of flexible material that is attached to the pipe. You’ll then use a clamp to hold the patch in place. Once you’ve attached the patch, you’ll need to seal it. Definitely, the best way to do this is to use a caulking gun.
6. Check for Corrosion
One of the main reasons for leaks is corrosion. This is a process in which the metal in the pipe begins to rust. If this is the case, you’ll need to check for corrosion. To do this, you’ll need to remove the clamps from the patch. You’ll then need to cut the patch off the pipe. Without a doubt, you’ll need to use a hacksaw. Once you’ve cut the patch off the pipe, you’ll need to check for corrosion. You’ll want to do this by touching the patch. If the patch is flexible, you’ll want to check for corrosion on both sides. If the patch is stiff, you’ll only need to check the top side.
7. Repair the Drain
The next step is to repair the drain. This is important because a clogged drain can cause the leak. If you find that the leaking pipes are caused by a clogged drain, you’ll need to clear the drain. To do this, you’ll need to use a plunger to force water out of the drain
8. Fix the Drain by Removing Water Pressure
Once you’ve cleared the drain, you’ll need to fix the drain. To do this, you’ll need to fix the drain by lowering the water pressure. To do this, you’ll need to remove the stopcock. This is a small valve that you’ll need to turn.
9. Install a P-Trap
The next step is to install a P-trap. This is a device that you’ll need to install to prevent the drain from overflowing. The P-trap is usually installed at the bottom of the drain.
10. Install a Backflow Preventer
The next step is to install a backflow preventer. This is a device that you’ll need to install to prevent water from coming back up the drain.
Check the Pipe
After you’ve done all of the methods , you’ll need to check the pipe. Soon, you’ll notice that there is water coming out of the pipe. This is a good sign that you’ve fixed the leak. But, if you find that the leak is still occurring, you’ll need to call the professional plumber to fix the problem. So, If you are in Toronto then you can call any of good Toronto Plumber . They’ll be able to find the problem and fix it because they have efficient tools and experience.
Conclusion
A leak can be a major problem. But, if you’re able to find the leak and fix it, it will only be a minor problem. But, if you can’t fix the leak, you’ll need to call a professional plumber. This will ensure that you get your problem fixed quickly and efficiently. We hope that you’ll find this article useful. If you have any questions, please contact Toronto Plumber.


It’s very simple to find out any matter on net as
compared to books, as I found this paragraph at this web site.
Very good article! We will be linking to this great
post on our website. Keep up the good writing.
Hi! I simply would like to give you a big thumbs up for your great information you have
got here on this post. I’ll be returning to your site for more
soon.